Creating and Managing Integrations for Development
Information for developers on how to begin building and managing Hover Integrations
Overview
You can create and manage your integrations directly within the Hover web application, accessible through your organization's settings. Once you have created an integration and are ready to go live with your workflow, we recommend:
- Testing your integration with an example of your real workflow scenario
- Letting the Hover team know 10 days in advance
- Aligning with the Hover team on a Monday, Tuesday or Wednesday go-live date to ensure we are online to support, and verify we see traffic flowing as expected.
Note: This is section only visible to Team Admins.
Creating a new Integration
Here's how to set up a new integration:
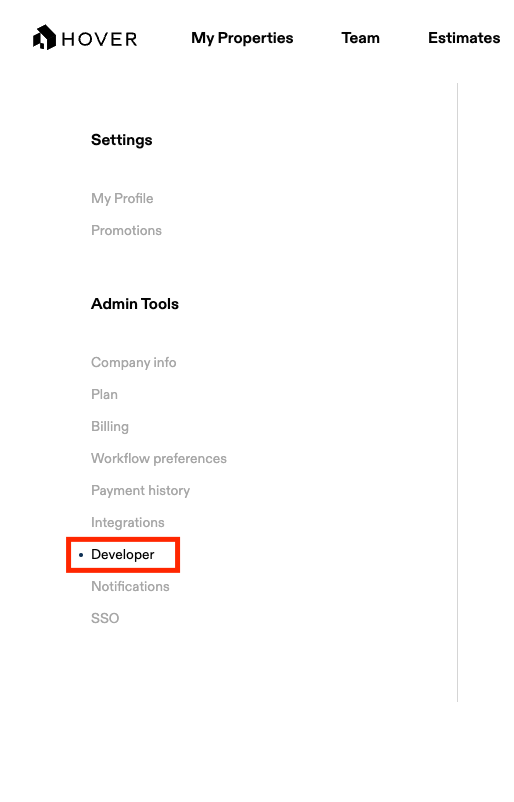
- In the top right-hand corner of the page, click your email address, then select Settings.
- On the left-hand menu, click Developer.
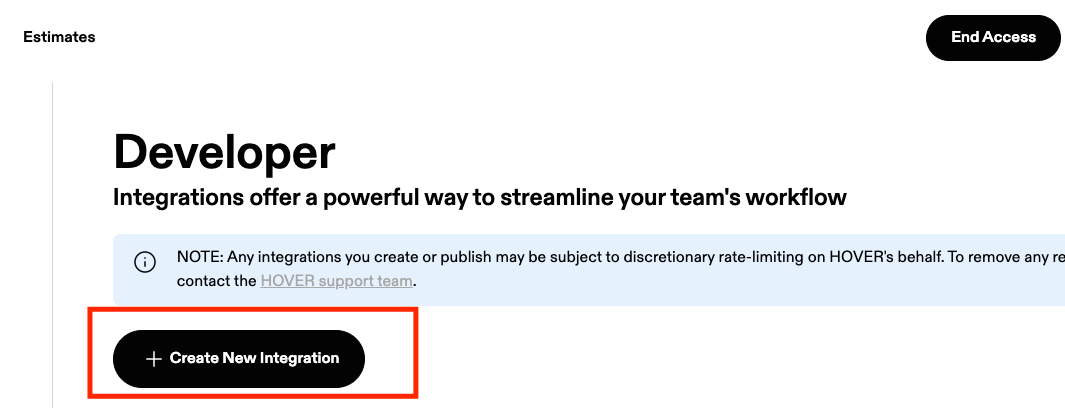
- Click the Create New Integration button.
- Fill out the four required fields to create your integration:
- Integration Name -- The name of your integration
- Redirect URI -- This is the location where the authorization server sends the user once the app has been successfully authorized and granted an authorization code. The redirect uri must be a valid, secured (https) site
- Description -- A brief description of your integration
- Logo -- Your company's logo
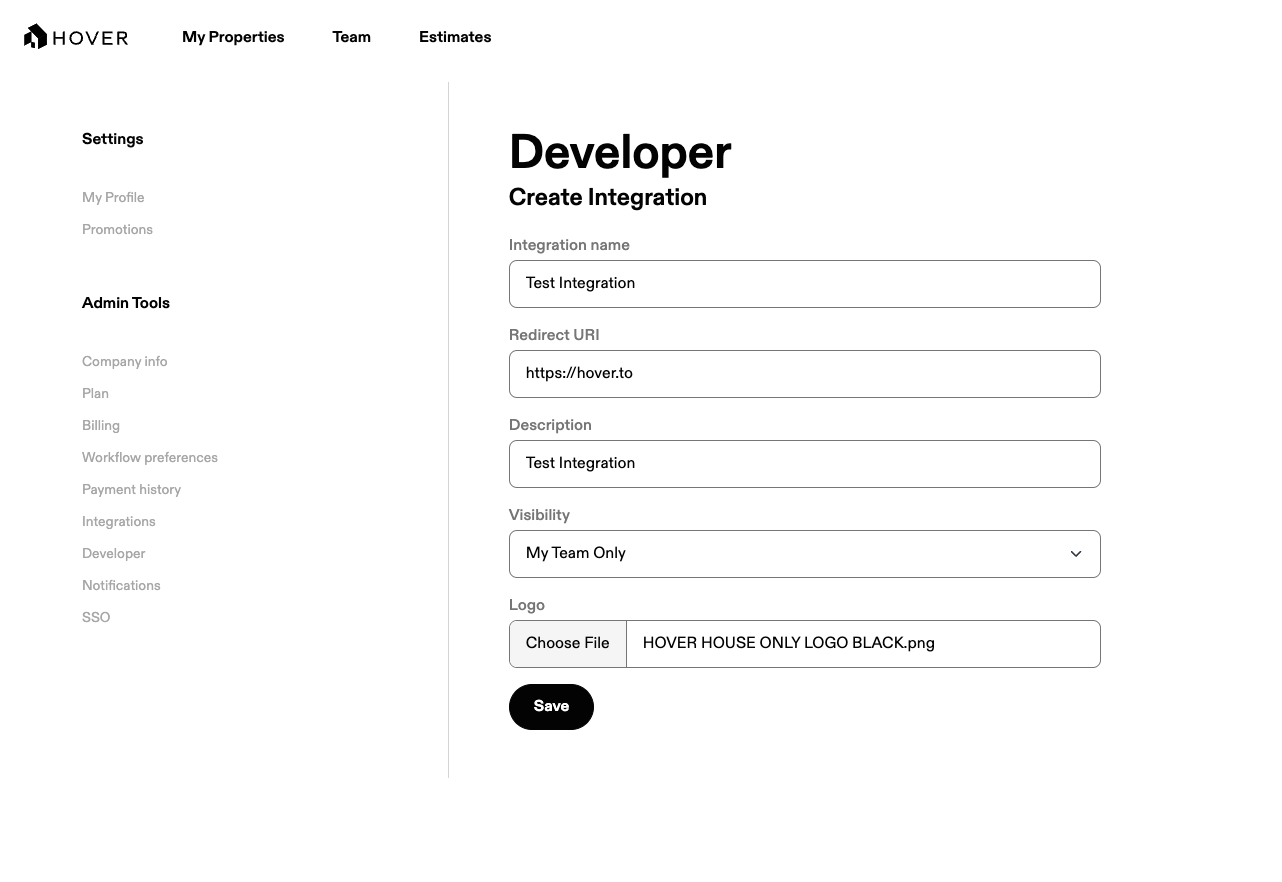
- Once those fields have been completed, click Save Integration
Retrieving your API Credentials
After creating your integration, you'll need to retrieve your API credentials:
- From the Developer tab in your organization's settings, click Edit next to the integration you wish to manage.
- Your OAuth Client ID will be visible on the right side of the screen.
- To view your Client Secret, click the Reset button and confirm your selection.
- Save these credentials in a secure location. We recommend periodically rotating (resetting) your Client Secret value for enhanced security.
Updated 5 months ago
Did this page help you?